
White labelling allows you to customize the Rayven platform to reflect your brand, providing a cohesive experience for your team and clients.
Steps to Customize Your White-Labeled Domain:
1. Secure a Domain URL
If you don’t already have a domain, you’ll need to secure one. Once you have your domain and want to white-label your solution, follow these steps:
2. Contact Your Rayven Account Manager
Reach out to your Rayven Account Manager to configure the necessary settings. They will provide you with a destination IP address that will point to Rayven's servers.
3. Create a DNS Record
To point your domain URL to Rayven:
- Create an A Name or C Name record on your DNS server.
- Use the destination IP address provided by Rayven to link your custom domain to Rayven’s platform.
4. Set Up SSL Certification
To secure your custom domain, you’ll need an SSL certificate:
- Option 1: Send your existing SSL certificate to your Rayven Account Manager, and they will configure it for your white-labeled domain.
- Option 2: If you don’t have an SSL certificate, Rayven can generate one for you. Once set up, the certificate will be emailed to you for installation.
5. Configure Essential Email Addresses
If Rayven generates the SSL certificate, you’ll receive it via email. To ensure everything runs smoothly, you'll need to create and maintain access to the following email addresses under your domain:
- yourdomain.com@domainsbyproxy.com
- admin@yourdomain.com
- administrator@yourdomain.com
- hostmaster@yourdomain.com
- postmaster@yourdomain.com
- webmaster@yourdomain.com
Customizing Additional White-Labeling Elements
Once your domain is set up, you can further customize various branding elements in the Rayven Workspace. These include:
1. Account Name
- You can customize the Account Name (e.g., “Rayven Dynamix”) to reflect your brand or project title.
2. Workspace URL & Dashboard URLs
- Customize your Workspace URL and Dashboard URL to match your branded domain (e.g., rayvendynamix.io).
- Configure the Dashboard Login URL for users to access the dashboard directly.
3. Login Page Customization
- Login Page Title: Set a custom title for the login page.
- Login Page Logo: Upload your custom logo (recommended size: 162x45px).
- Login Page Background: Add a background image (recommended size: 200kb).
4. Account Visualization
- Header Logo: Upload a custom header logo (recommended size: 140x49px).
- Header Background: Customize the header background color or image.
- Browser’s Tab Icon: Upload a favicon for the browser tab (recommended size: 16x16 or 32x32px).
5. Dashboard & Widget Appearance
- Dashboard Background Color: Set the background color of the dashboard using a hex code (e.g., #F1F1F1).
- Dashboard Background Image: Upload a background image (recommended size: 1920x1080, max size: 2MB).
- Widget Background Color: Customize the widget background color (hex code, e.g., #FFFFFF) and set transparency levels (e.g., 0%).
- Widget Alignment: Align widgets to the left or center as needed.
6. Dashboard Font & Formatting
- Dashboard Font: Customize the font for your dashboard.
- Commas and Decimal Precision Format: Adjust the format to suit your region or preferences.
- Date Format: Select the date format that best suits your audience.
7. Theme Customization
- Select Theme: Choose from pre-built themes or create your own color theme using hex codes. Available theme colors include:
- #3DB4D3, #5cc0da, #dcf8ff, #FF9636, #FFB46F, #FFD7B2, #6E4B88, #81599F, #BC92DB, #899B64, #B6CF84, #F8FFCA.
- Charts Default Colors: Set the default colors for charts and graphs to match your brand’s palette.
8. Mail Server Settings
- Configure your Mail Server Settings to send emails from your custom domain:
- Server
- Port
- Password
9. Data Settings
- Real-time Widgets Refresh Interval: Define how often widgets refresh in seconds (minimum value: 30 seconds).
- Interval Calculation: Choose between "From start of interval (including) to end of interval (not including)" or "From start of interval (not including) to end of interval (including)."
Accessing and Customizing Domain and Settings
Once your white-labeled domain and branding elements are set up, you can further customize these settings:
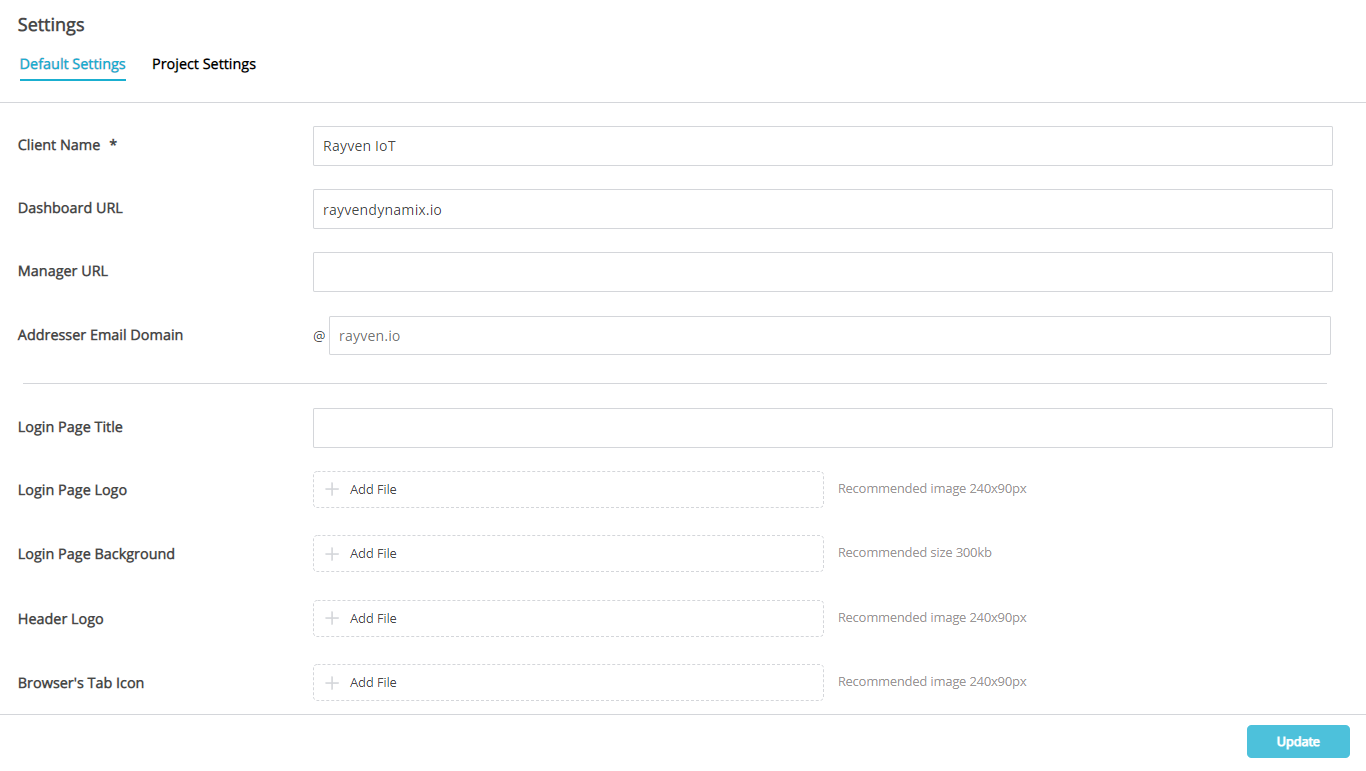
1. Navigate to Settings
- Click on the menu icon in the top-right corner of the Rayven Workspace.
- Select Settings.
2. Configuring Default Settings vs. Project Settings
You can choose to customize your settings either for all projects or for specific projects.
-
Default Settings: These settings apply to all projects in your Rayven account. For example, you can set up emails to send from a default domain (e.g., @all_projects.com), and this will be used for all communications across your projects.
-
Project-Specific Settings: If you want different settings for a particular project, you can override the default.
- Navigate to Project Settings.
- Select the specific project you want to customize.
- Set emails to send from a different domain (e.g., @my_project.com), which will apply only to that project, overriding the default settings.
Example Scenario:
- You might set a general email domain (e.g., @all_projects.com) to apply across all projects.
- For a particular project, however, you could override this by setting a project-specific email domain (e.g., @my_project.com), which will take precedence for that project’s communications.
Summary
Customizing your white-labeled domain and additional settings allows you to fully brand the Rayven platform and tailor the user experience to match your organization’s needs. From setting custom domains and SSL certificates to adjusting dashboard themes and email servers, Rayven provides flexibility to create a seamless experience for your users.
For further assistance with your white-labeled domain setup and customization, please contact your Rayven Account Manager.