![Ravyen Transparent 1390x426-1.png]](https://insights.rayven.io/hs-fs/hubfs/000%20-%20Rayven/Rayven%20Brand%20Assets/Rayven%20Logos/Ravyen%20Transparent%201390x426-1.png?height=50&name=Ravyen%20Transparent%201390x426-1.png)
Overview
Filtering incoming data in a Rayven workflow ensures that only relevant information is processed, stored, or acted upon. By applying filters early in the workflow, you can reduce processing load, maintain cleaner datasets, and drive more accurate interface displays or automated actions. Filtering can be based on simple conditions, complex logic, or custom code.
Pre-Workflow Filtering Using Labels
While not technically part of filtering inside a workflow, you can use label-based filters in triggerable nodes (such as the Trigger node or certain connector nodes) to control which Primary Table UIDs will cause the workflow to run.
-
This limits workflow execution to only the relevant UIDs.
-
Filtering happens before any data enters the workflow’s main logic.
-
Useful when you want to avoid triggering the workflow for entire categories of assets, users, or records.

Filtering Inside a Workflow
1. Using Conditional Filter Node
The Conditional Filter node is the key tool for filtering data inside a workflow. It is the only logic node that can directly decide whether a payload continues through the workflow or is blocked.
You configure the Conditional Filter by defining one or more conditions that evaluate values within the payload — for example:
-
Check if a JSON key equals a specific value.
-
Verify if a number is greater than or less than a threshold.
-
Ensure a key is present or not present.
Payloads that meet the conditions pass through to the next node; those that do not are stopped.

This makes the Conditional Filter node central to the filtering process. Other nodes, such as Rule Builder and JavaScript, are often used alongside it:
-
They allow you to evaluate complex conditions, append new values, or transform existing values in the payload.
-
The Conditional Filter then acts on those results to enforce whether data is allowed to flow or not.
By combining these nodes, you can create clear, powerful, and flexible filtering logic that both prepares and controls incoming data.
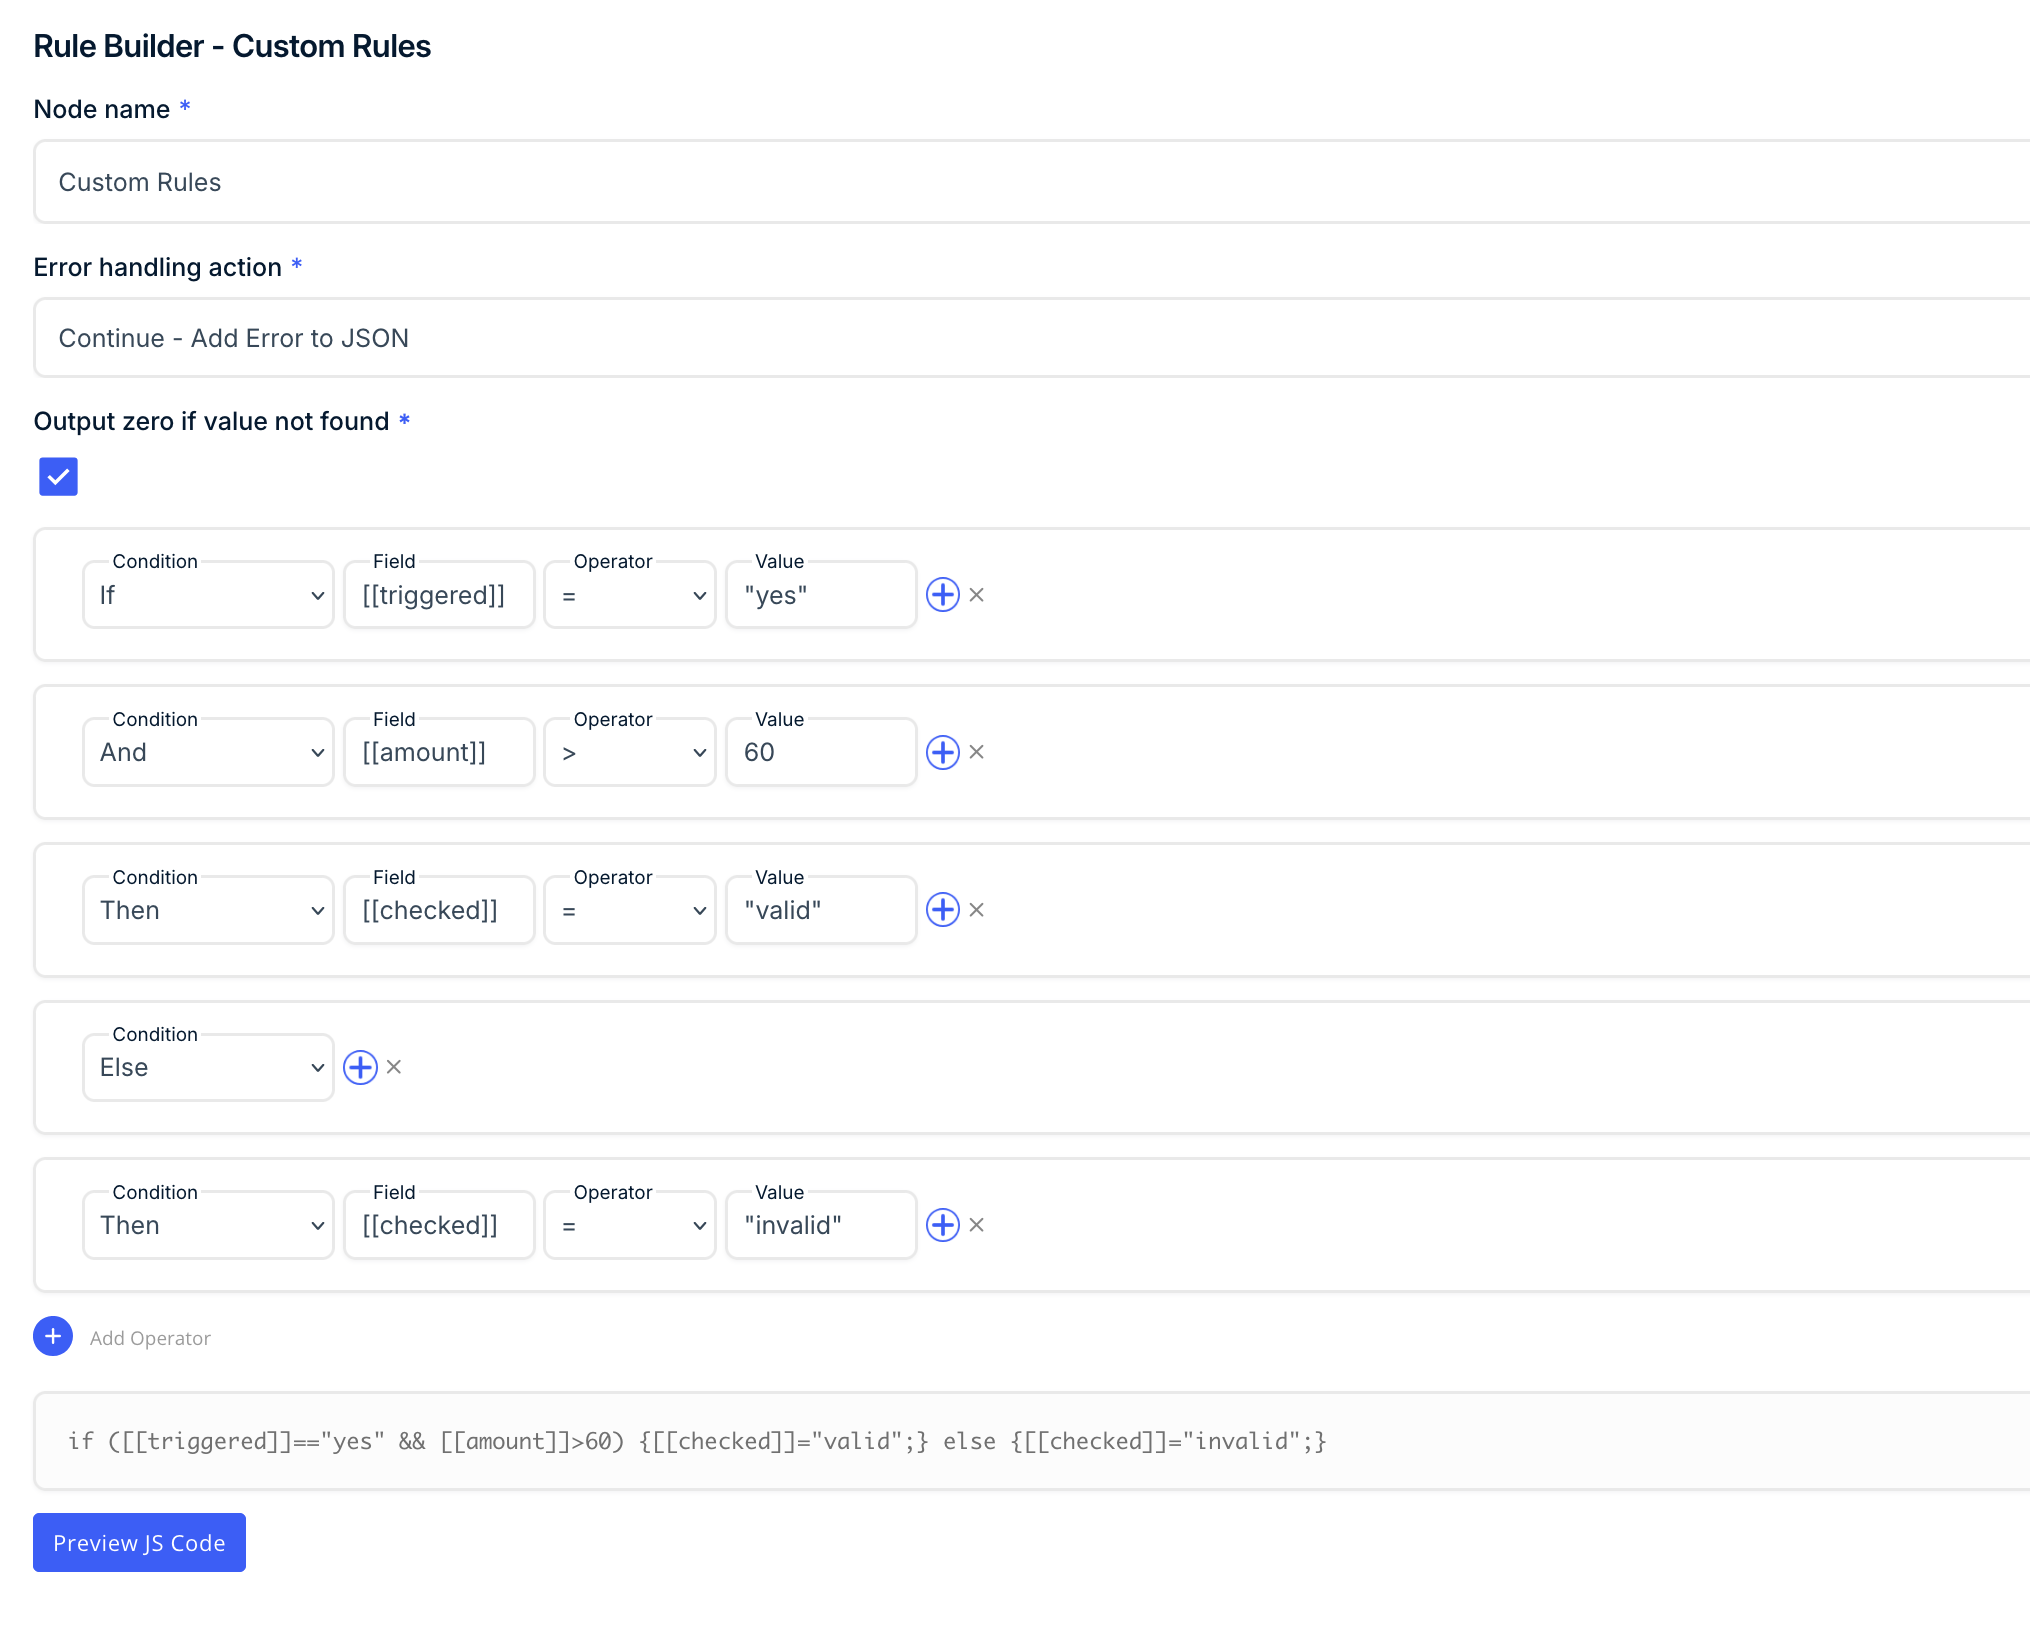
2. Using Rule Builder Node
The Rule Builder node enables you to evaluate incoming payloads against a set of conditions and then write the results back into the payload. This makes it possible to tag, classify, or enrich the data dynamically as it moves through the workflow.
For example, you might configure rules to check whether:
-
A trigger flag is active,
-
A numeric value exceeds a defined threshold, and
-
A status value should be marked as
"valid"or"invalid".

The Rule Builder is best suited for:
-
Categorising data with pass/fail or status outcomes.
-
Running multiple logical checks in one place.
-
Preparing payloads so other nodes can act on the results.
While the Rule Builder itself does not block payloads from moving forward, it is often used in combination with the Conditional Filter node:
-
Rule Builder evaluates the conditions and writes the outcome into the payload.
-
Conditional Filter then reads those results and decides whether the payload continues through the workflow.
This pairing allows you to separate evaluation from filtering, keeping complex business logic clear and reusable.
3. Using JavaScript Node
The JavaScript node provides maximum flexibility for inspecting and manipulating workflow data. You can write custom scripts to transform payloads, calculate new values, or embed complex business logic that isn’t possible with prebuilt nodes.
Typical uses include:
-
Creating new fields in the payload based on calculations.
-
Parsing or restructuring incoming JSON.
-
Applying advanced conditions or multi-step logic to enrich the payload.

Like the Rule Builder node, the JavaScript node does not stop payloads from flowing through a workflow by itself. Instead, it adds or modifies values in the payload. To actually prevent unwanted data from progressing, the JavaScript node is typically used together with a Conditional Filter node:
-
JavaScript evaluates the data and adds a result (e.g.
payload.valid = true/false). -
Conditional Filter then checks that result and allows or blocks the payload accordingly.
This combination allows you to implement fully custom filtering logic while keeping workflow control clear and maintainable.
Best Practices
-
Use Conditional Filter for enforcement – It is the only node that directly stops or allows data. Always anchor your filtering logic around it.
-
Prepare payloads with Rule Builder or JavaScript – Use these nodes to evaluate, append, or transform values so that Conditional Filter can act on them.
-
Filter early – Place filtering logic close to data ingestion to minimise unnecessary processing downstream.
-
Keep rules clear and maintainable – Name your nodes descriptively, and use comments in JavaScript for transparency.
-
Test using Inspect Data – Confirm what the payload looks like before and after filtering logic to ensure your conditions are applied correctly.
Summary
Filtering in Rayven workflows hinges on the Conditional Filter node, which is the only node capable of directly stopping or allowing data to pass through. Supporting nodes like Rule Builder and JavaScript extend this capability by evaluating conditions, appending or changing values, and embedding complex logic into the payload. By combining them, you can create workflows that not only enforce business rules but also dynamically adapt payloads before those rules are applied. This layered approach ensures filtering is efficient, accurate, and adaptable to different use cases.
FAQs
Q: Can I filter data before it enters the workflow?
A: Yes. Label-based filtering in triggerable nodes (e.g., Trigger or certain connectors) limits which Primary Table UIDs will start the workflow.
Q: Which node actually blocks data from continuing?
A: Only the Conditional Filter node can stop a payload from flowing further. Other nodes (Rule Builder, JavaScript) evaluate and transform payloads but do not block them on their own.
Q: How do Rule Builder and JavaScript fit into filtering?
A: They enrich the payload by evaluating conditions, appending or changing values, and applying advanced logic. The Conditional Filter then checks these results to decide if the payload continues.
Q: Can filtering be dynamic?
A: Yes. You can use dynamic values in Conditional Filter conditions, or generate values programmatically in Rule Builder or JavaScript, and then filter on those results.
Q: How do I test my filtering logic?
A: Use the Inspect Data tab on nodes to compare incoming and outgoing payloads. This helps confirm that Rule Builder or JavaScript nodes are creating the right outputs, and that Conditional Filter is enforcing them as expected.